How to Unclog a Kitchen Faucet Aerator
View Count:8 CategoryBlog
If your kitchen faucet’s water flow has suddenly slowed down, don’t panic — the problem might be simpler than you think. One of the most common causes of weak or uneven water flow is a clogged faucet aerator. Over time, mineral deposits, sediment, and small debris can accumulate inside the aerator, restricting the flow of water. Fortunately, unclogging it is a quick and easy fix that most homeowners can do without professional help.
In this guide, we’ll walk you through everything you need to know about identifying, cleaning, and maintaining your faucet aerator to restore smooth water flow and extend your faucet’s life.
What Is a Faucet Aerator and Why It Gets Clogged
A faucet aerator is the small, round piece screwed onto the tip of your faucet spout. It mixes air into the water stream, creating a smooth, splash-free flow that conserves water and improves efficiency. Most kitchen faucets have aerators because they help maintain consistent water pressure while using less water — a win for both performance and the environment.
However, over time, mineral buildup (from hard water), tiny debris (from pipes or municipal supply), or even rust flakes can collect in the aerator’s fine mesh screen. As these materials accumulate, they restrict the water’s path, leading to symptoms like:
- Reduced water pressure
- Uneven or spraying water stream
- Dripping or sputtering faucet
- Strange noises when running water
If you’re noticing any of these issues, it’s a strong sign your aerator needs cleaning or replacement.
Step-by-Step Guide: How to Unclog a Kitchen Faucet Aerator
Step 1: Gather Your Tools and Supplies
Before starting, gather the following items to make the process smooth and mess-free:
- Adjustable wrench or pliers (optional)
- Masking tape or a soft cloth (to protect faucet finish)
- Small bowl or container
- White vinegar
- Old toothbrush or small brush
- Needle or safety pin (for stubborn debris)
- Towel to catch drips
Having everything ready ensures you can take the aerator off, clean it thoroughly, and reinstall it quickly.
Step 2: Remove the Aerator
Most aerators simply screw onto the end of the faucet spout. You can often remove it by hand:
- Grip the aerator firmly and twist counterclockwise.
- If it’s tight or stuck, wrap masking tape or a soft cloth around it to avoid scratching the finish.
- Use pliers or an adjustable wrench to gently loosen it. Avoid using too much force — the goal is to unscrew, not damage, it.
Once removed, check whether your aerator is a simple one-piece design or a multi-part assembly (some modern aerators include multiple layers or inserts).
Step 3: Inspect the Aerator Components
Hold the aerator up to the light. You’ll likely see small particles, mineral flakes, or even discolored buildup on the screen or inside the housing.
Disassemble the aerator carefully — most have three main parts:
- Housing: The metal or plastic outer shell.
- Screen: The fine mesh that filters debris and breaks water into smaller streams.
- Washer or flow restrictor: A rubber or plastic piece that controls flow rate.
Take note of the order and orientation of each part, or snap a quick photo before disassembly — it’ll make reassembly easier later.
Step 4: Soak in Vinegar to Dissolve Buildup
To loosen mineral deposits, fill a small bowl with white vinegar and soak the aerator components for 15 to 30 minutes.
Vinegar naturally dissolves calcium and lime deposits without damaging metal or plastic parts. For tough buildup, you can leave it soaking for an hour or longer. After soaking:
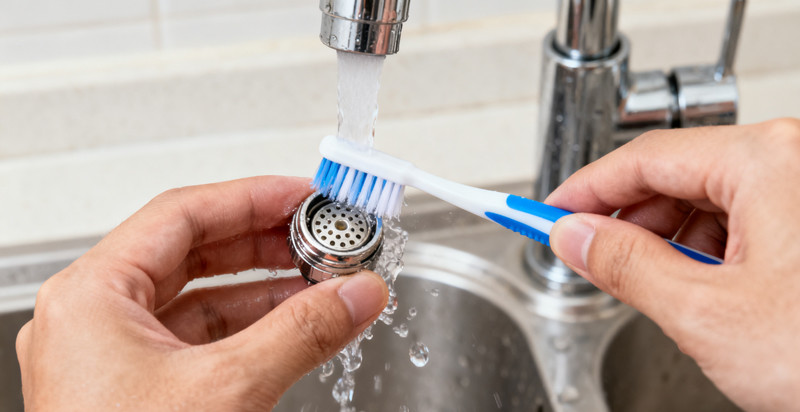
- Use an old toothbrush to scrub off any remaining residue.
- Use a needle or pin to poke through the screen holes gently, clearing any remaining clogs.
- Rinse everything thoroughly under running water.
If your aerator looks clean and the water flows through it freely when you rinse, you’re ready for reassembly.
Step 5: Reassemble and Reinstall the Aerator
After cleaning, reassemble the aerator parts in the same order as before. Make sure the washer or O-ring sits properly to prevent leaks. Then:
- Screw the aerator back onto the faucet spout by hand.
- Tighten gently with pliers if necessary (again, protect the finish with cloth or tape).
- Turn on the faucet to test the water flow.
If the water runs smoothly and evenly, congratulations — you’ve successfully unclogged your kitchen faucet aerator!
When to Replace Instead of Clean
In most cases, a good vinegar soak restores your aerator’s performance. However, if you notice any of the following, it may be time to replace it:
- The screen is corroded or torn
- The threads are stripped or damaged
- The rubber washer is cracked or missing
- The aerator still restricts flow after thorough cleaning
Replacement aerators are inexpensive and widely available at hardware stores or online. Just be sure to match the thread size and flow rate to your faucet model (standard kitchen faucets usually use a 15/16″ male or 55/64″ female thread).
How Often Should You Clean the Aerator?
How often you clean your aerator depends largely on your local water quality. If you live in an area with hard water, you may need to clean it every 3–4 months. For softer water or newer plumbing systems, once or twice a year may be enough.
To maintain smooth water flow year-round:
- Wipe the aerator with a cloth monthly.
- Do a full vinegar soak every few months.
- Consider installing a whole-house water filter or under-sink filter to reduce sediment and minerals.
A little preventive maintenance goes a long way in keeping your faucet performing like new.
Extra Tip: For Faucets with Built-In Aerators
Some modern kitchen faucets — especially pull-down or pull-out models — have built-in aerators that don’t unscrew easily. These require a special key or removal tool, often included in the faucet’s packaging or available from the manufacturer.
If you have one of these models, refer to your faucet’s manual for instructions. You can still soak or clean the aerator once it’s removed, using the same vinegar method.
Final Thoughts
A clogged aerator might seem like a small inconvenience, but it can significantly impact your faucet’s performance and water efficiency. Luckily, cleaning it is one of the simplest DIY plumbing tasks — requiring no special tools, minimal time, and zero professional help.
By regularly inspecting and cleaning your aerator, you’ll not only restore strong, even water flow but also help extend the life of your faucet and save on water bills. So, the next time your kitchen faucet starts sputtering or slowing down, skip the plumber — grab some vinegar and take charge.
Your faucet (and your wallet) will thank you.
 Faucet Online


您好!Sign In