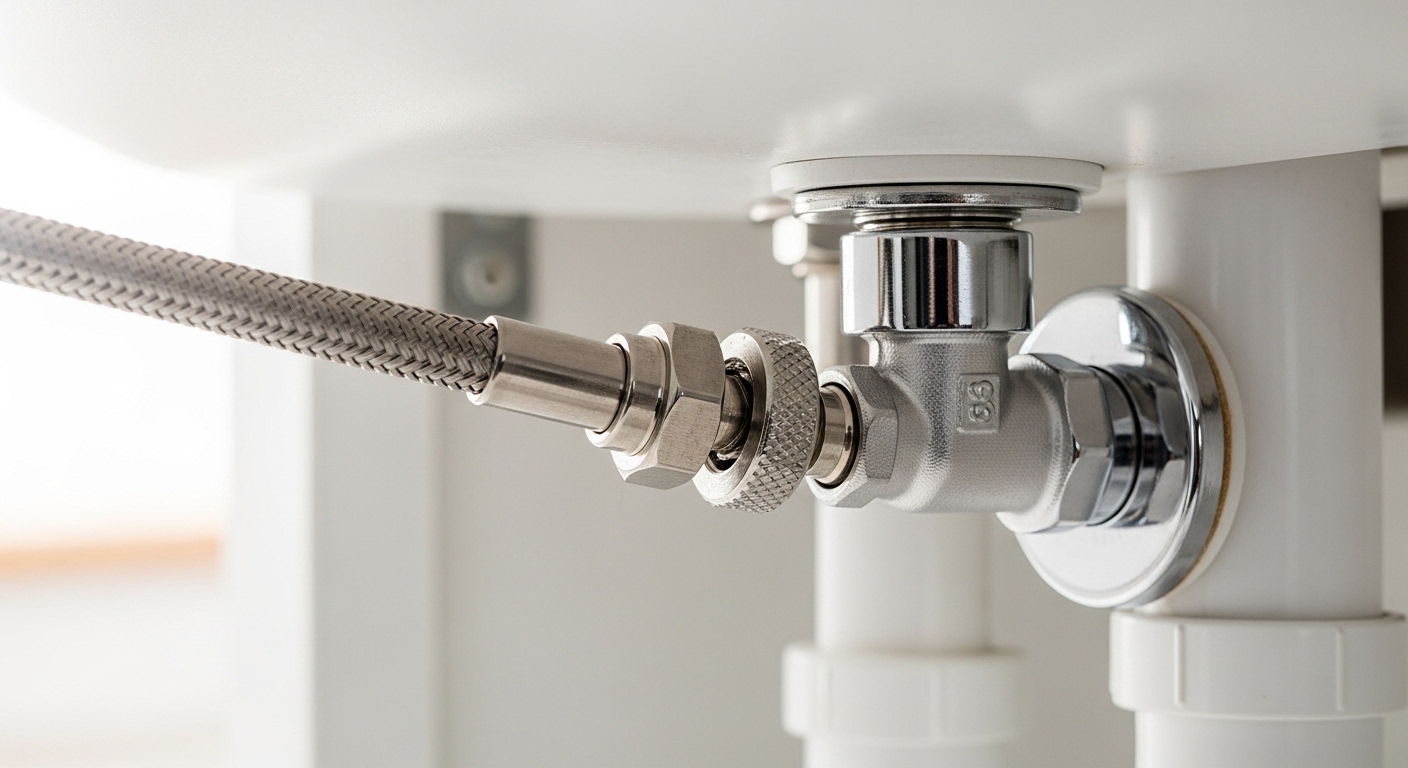
A faucet supply line too short to comfortably reach from your shutoff valve up to the faucet tailpiece is one of the most common surprises during a DIY faucet swap — and it’s almost always fixable in under 20 minutes without calling a plumber. The problem usually isn’t the faucet; it’s that new faucets, deeper sinks, and repositioned valves change the distance the line has to travel. Below, we’ll walk through exactly why it happens, the three legitimate ways to fix it, how to size the right part, and the mistakes that turn a $6 fix into a flooded cabinet.
Why is my new faucet’s supply line too short all of a sudden?
Your supply line is too short because the geometry under the sink changed — even if the faucet looks similar. The most common causes are a deeper or thicker sink deck, a faucet with pre-attached hoses that are shorter than your old braided lines, a shutoff valve mounted lower or farther back on the wall, or a garbage disposal and P-trap that force the line to route around them instead of straight down.
Many pull-down kitchen faucets and modern bathroom faucets now ship with captive supply lines already crimped to the faucet body. Those are typically 20–24 inches long, which is fine for a standard 6-inch sink and a valve 8–10 inches below the deck. But if you have a farmhouse sink, a thick stone countertop, or a valve installed close to the floor, that captive line simply runs out of reach. It’s not defective — it’s just built for an average install, and your cabinet isn’t average.
Water pressure matters here too. A line stretched tight is under constant mechanical stress, and any additional strain from thermal expansion or a pressure spike gets concentrated at the threaded coupling. If you’re already fighting weak flow, don’t confuse a short, kinked line with a pressure problem — our guide on why faucet water pressure is too low and how to fix it covers how a pinched or kinked supply line quietly chokes your flow rate.
How do I extend a faucet supply line that won’t reach the shutoff valve?
The cleanest fix is to add a braided stainless-steel extension hose that couples to your existing line, or better yet, replace the short line entirely with one long enough to run with a gentle curve. You have three real options, ranked from best to acceptable:
- Replace with a longer supply line (best): Remove the short line completely and install a single longer braided hose that runs from valve to faucet in one piece. Fewer connections means fewer leak points. Ideal when your line is a standard removable hose.
- Add an extension coupling (good, when the line is captive): If the faucet’s supply line is permanently attached, thread a female-to-female extension hose onto the loose end. This adds one union but is perfectly safe when both connections are properly seated and the extension is rated for potable water.
- Reposition or add a valve (advanced): If the run is genuinely too long or awkward, a plumber can add a compression angle stop closer to the faucet. This is overkill for most people and only worth it during a larger remodel.
Whichever route you take, leave a gentle loop — never a straight, guitar-string-tight run. The line should droop slightly so there’s zero tension pulling on either nut. A relaxed line lasts years; a stretched one telegraphs every vibration and pressure change straight into the threads.
Is it safe to just use a supply line extension coupler?
Yes — a supply line extension coupler is safe when it’s a certified potable-water part, correctly threaded, and hand-tightened plus a quarter turn with a wrench. The myth that “every extra connection is a leak waiting to happen” is only true if the joint is done sloppily. A properly seated braided-line union with an intact rubber washer is as reliable as the factory connection.
The two rules: match the thread type (most residential faucet ends are 1/2″ FIP or 3/8″ compression), and don’t stack multiple couplers to bridge a big gap. One extension is fine; three couplers chained together is a red flag that you need a longer single line instead.
What length and connection size supply line do I actually need?
Measure the straight-line distance from the shutoff valve outlet to the faucet tailpiece, then add 4–6 inches so the hose can curve without tension. For sizing the ends, the valve side is almost always 3/8″ compression, and the faucet side is either 1/2″ FIP (female iron pipe) or 3/8″ compression depending on the faucet. When in doubt, buy a line labeled “3/8″ comp x 1/2″ FIP” — it fits the majority of North American faucets and valves.
Here’s how the common lengths map to real installs:
| Supply line length | Best for this scenario | Typical connection ends |
|---|---|---|
| 12 in | Valve mounted high, shallow bathroom sink | 3/8″ comp x 3/8″ comp |
| 16 in | Standard bathroom lav faucet, average valve height | 3/8″ comp x 1/2″ FIP |
| 20 in | Standard kitchen faucet, 6–8 in sink depth | 3/8″ comp x 1/2″ FIP |
| 24 in | Deep kitchen sink, valve set low on wall | 3/8″ comp x 1/2″ FIP |
| 30–36 in | Farmhouse sink, thick stone counter, or routing around a disposal | 3/8″ comp x 1/2″ FIP |
Buy one size up if you’re between lengths — a slightly long line loops gracefully, while a slightly short one strains. Braided stainless-steel lines are the standard for a reason: the woven jacket resists bursting, and the EPDM inner tube handles hot and cold. Avoid cheap PVC or vinyl lines for anything permanent; they harden and split over time.
Can I reuse my old supply lines if they’re long enough?
You can, but you usually shouldn’t. Old braided lines that are still long enough may seem fine, but the rubber washers inside compression fittings take a set after years of pressure, and reusing them often causes weeping leaks. Supply lines cost a few dollars — replacing them during any faucet swap is cheap insurance. If your old line is a rigid chrome or copper riser, definitely don’t reuse it; those crack when re-bent.
One exception: if your existing lines are recent, braided stainless, and the correct length, and you’re only replacing the faucet cartridge rather than the whole faucet, you can leave them alone. In that case, our walkthrough on installing a kitchen faucet cartridge without calling a plumber gets you back to full flow without touching the supply lines at all.
What tools and steps fix a short supply line, start to finish?
The whole job needs a crescent wrench (or two), a towel, a bucket, and the right supply line or extension. Here’s the sequence that avoids leaks:
- Shut off the water at the angle stops under the sink, then open the faucet to relieve pressure. Put a towel and small bucket beneath the connections.
- Disconnect the short line. Hold the valve body steady with one wrench and loosen the nut with another so you don’t twist the valve on the wall.
- Choose your fix: either swap in a longer line or thread an extension onto a captive line.
- Hand-thread first. Start every nut by hand to avoid cross-threading — this is the #1 cause of leaks.
- Snug it, don’t crank it. Hand-tight plus a quarter to half turn with the wrench. Over-tightening crushes the washer and causes leaks, not prevents them.
- Leave a gentle loop so the line isn’t under tension.
- Turn the water back on slowly and watch every joint for 60 seconds. Wipe each connection dry and check again after five minutes.
If you’re doing a full faucet replacement rather than just the lines, it’s worth reading our complete DIY guide to changing a kitchen sink faucet so the supply-line step lands in the right order — you want the faucet mounted and the deck plate seated before you make the final water connections. And if you’re pulling out an old faucet first, the step-by-step on removing a faucet from under the sink shows how to reach cramped nuts without stripping them.
What if the shutoff valve itself is in a bad spot?
If the valve is so low or far back that even a long line strains, the real fix is relocating or adding a valve — but 90% of the time, a 30- or 36-inch braided line solves it without touching the plumbing. Before you assume the valve is the problem, dry-fit a longer line and route it with a loop; you’ll often find the extra length is all you needed. Only bring in a plumber to move a valve if the cabinet interior genuinely can’t accommodate any routing that avoids tension.
What mistakes make a short supply line leak or fail?
The failures almost always trace back to tension, cross-threading, or the wrong washer. A supply line that’s too short and stretched tight puts constant load on the threads; over months, that load loosens the nut or fatigues the ferrule until it weeps. Here are the specific mistakes to avoid:
- Stretching a short line to “just barely reach.” This is the cardinal sin. If it’s tight, it’s wrong — get a longer line.
- Over-tightening to stop a drip. Cranking down deforms the washer and often makes the leak worse. Back off, reseat, and snug gently.
- Cross-threading the nut. Always start by hand. If it resists in the first turn, unscrew and realign.
- Mismatched connection types. Forcing a 1/2″ nut onto a 3/8″ thread never seals. Confirm both ends before buying.
- Chaining multiple extension couplers. One extension is fine; a daisy-chain of three is a leak farm.
- Reusing an old, hardened washer. New line, new washer, every time.
If you notice mineral crust building on your connections, that’s a sign of a slow past leak plus hard water — worth addressing alongside the fix. Our piece on removing hard water deposits and buildup explains how the same minerals that clog aerators also creep into fittings.
How long should a properly installed supply line last?
A quality braided stainless-steel supply line, installed with a gentle loop and no tension, typically lasts 8–10 years before the washers should be preemptively replaced. Cheap vinyl lines can fail in 2–3 years. Because a burst supply line is one of the top causes of household water damage, many plumbers recommend swapping braided lines proactively every decade — a $6 part is far cheaper than a flooded kitchen cabinet.
FAQ
Can I use two supply lines connected together if mine is too short?
You can connect one extension coupler to bridge a small gap, and it’s perfectly safe if both joints are certified potable-water parts, correctly threaded, and snugged properly. But avoid chaining two or three couplers — every additional union is another potential leak point. If you need to add more than one coupler, buy a single longer supply line instead; it’s cleaner, cheaper, and more reliable.
How much longer than the gap should my supply line be?
Add 4–6 inches beyond the straight-line distance from valve to faucet. That slack lets the braided line curve in a gentle loop with zero tension on either connection. A line that’s a little too long simply droops harmlessly; a line that’s too short strains the threads and eventually leaks. When you’re between stock lengths, always round up.
Why does my faucet come with a supply line that’s too short?
Many modern faucets ship with pre-attached (captive) supply lines sized for an average install — roughly a 6-inch sink and a valve 8–10 inches below the deck. If you have a deep or farmhouse sink, thick stone countertop, or a low-mounted shutoff valve, that factory line simply can’t reach. It’s not a defect; you just need a female-to-female extension hose or a longer replacement line to close the gap.
Do I need to shut off the water to extend a supply line?
Yes, always. Close the angle-stop shutoff valves under the sink, then open the faucet to relieve the remaining pressure before disconnecting anything. Keep a towel and bucket underneath to catch the small amount of water still in the line. Skipping this step means water sprays across your cabinet the instant you loosen the nut.
Is a braided stainless steel supply line better than a plastic one?
For almost every situation, yes. Braided stainless-steel lines have a woven metal jacket over an EPDM rubber core that resists bursting, handles hot and cold water, and lasts 8–10 years. Plastic and vinyl lines are cheaper but harden, crack, and split over time, making them a poor choice for a permanent under-sink connection. For a durable faucet install, braided stainless is the standard.
What’s the difference between a supply line extension and a supply line plug?
An extension adds length so the line reaches the faucet, while a plug caps off an unused valve or line so it can’t leak. They solve opposite problems — one connects, one closes. If you’ve disconnected a fixture and have a live valve with nowhere to go, you want a plug; if your line just won’t reach, you want an extension. We break down capping in our guide to what a faucet supply line plug is and when you actually need one.
Author note: This guide was written by the WOWOW Faucet product and installation team, drawing on years of hands-on faucet fitting, customer support tickets, and real under-sink installs across kitchen and bath configurations. WOWOW designs and manufactures faucets and supply components tested to industry standards for potable-water safety and pressure durability, and our braided supply lines and faucets are backed by a manufacturer warranty. When a spec here matters for safety — like matching connection sizes or leaving a tension-free loop — it reflects what we tell our own customers and stand behind.