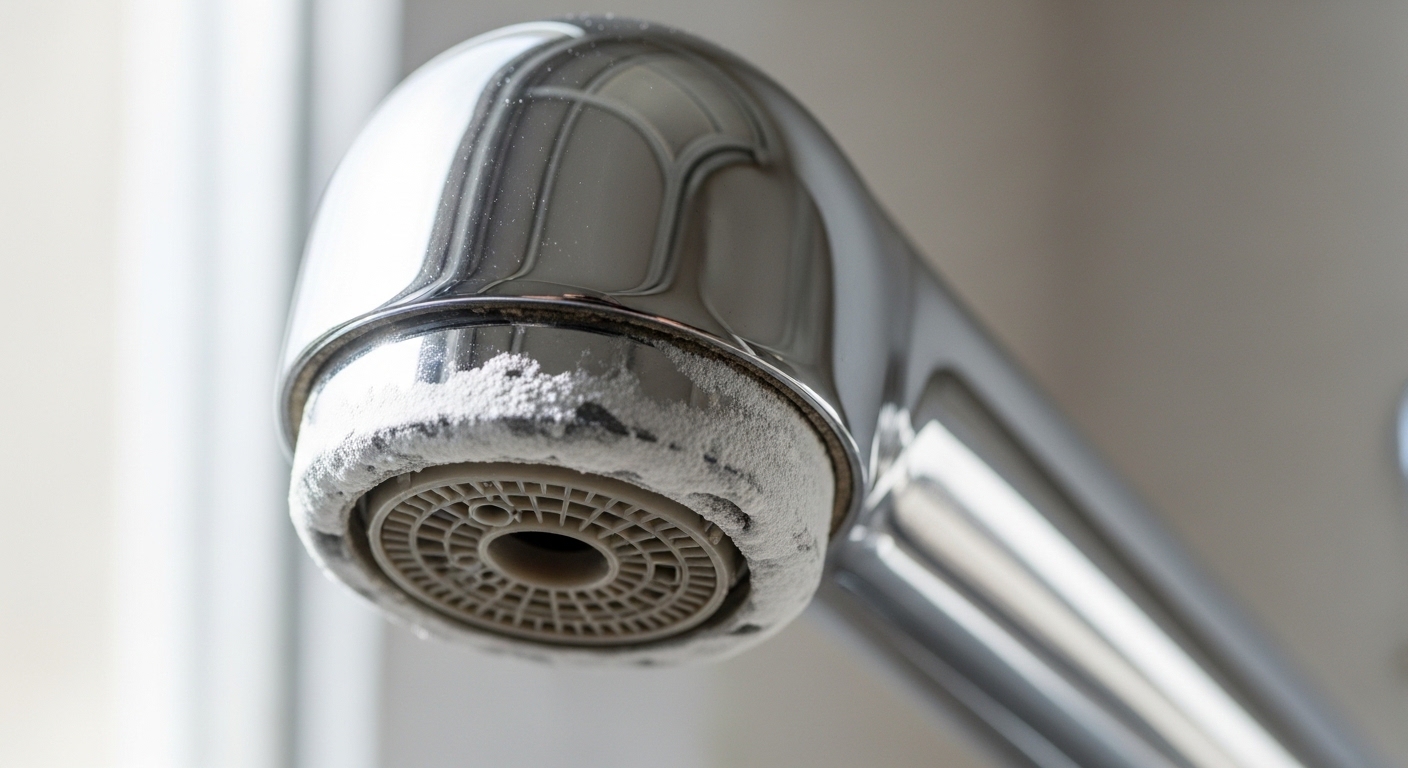
Removing hard water deposits from faucet head parts is one of the most common — and most satisfying — five-dollar faucet fixes you can do yourself. That crusty white or greenish-white ring around your aerator, the spray that suddenly shoots sideways, the flow that has dropped to a dribble: nearly all of it comes from calcium and magnesium minerals in your water drying out and hardening into limescale right at the tip of your faucet. The good news is you almost never need a plumber or a new faucet. You need vinegar, a little patience, and the right technique so you don’t wreck the finish while you’re at it.
Below, we’ll walk through exactly what the buildup is, the fastest safe way to dissolve it, what to do when vinegar alone won’t cut it, and how to keep it from coming back so you’re not doing this every three months.
What exactly are these white crusty deposits on my faucet head?
Those white, chalky, sometimes greenish crusts are limescale — mostly calcium carbonate and magnesium left behind when hard water evaporates. Every time water sits on the faucet tip and dries, it leaves a microscopic mineral layer. Over months, those layers stack up into the hard, sandy crust you can scrape with a fingernail.
If your deposits look more blue-green than white, that’s a sign of copper or brass reacting with the minerals, common on older plumbing. Either way, the removal method is the same. Hard water is measured in grains per gallon (GPG) or parts per million (PPM); anything above 7 GPG (about 120 PPM) is considered hard, and much of the U.S. sits between 7 and 25 GPG. The higher your number, the faster this buildup returns — which is why technique and prevention both matter.
The buildup does three annoying things: it clogs the tiny holes in your aerator or spray face so water sprays in wild directions, it chokes total flow so your faucet feels weak, and it traps moisture and grime that can turn into a home for bacteria. That last point is why a clean faucet head is a hygiene issue, not just a cosmetic one — more on that below.
What’s the fastest safe way to remove hard water deposits from a faucet head?
The fastest safe method is a white vinegar soak. Vinegar is a mild acetic acid that dissolves calcium carbonate without harming chrome, stainless, or most brushed finishes. Here’s the reliable step-by-step:
- Try to unscrew the aerator first. Most kitchen and bathroom faucet heads have a removable aerator at the tip. Turn it counterclockwise by hand, or wrap the housing in a cloth and use pliers gently so you don’t mar the metal. If it comes off, you can soak it directly in a cup — the easiest route.
- If it won’t budge, bag it. Fill a small sandwich bag or balloon with undiluted white vinegar, slip it over the faucet head so the tip is fully submerged, and secure it with a rubber band or a twist tie. This lets you soak the head in place without removing anything.
- Soak 30 to 60 minutes. Light deposits loosen in half an hour. Thick crust may need a full hour or an overnight soak. Warm (not boiling) vinegar works noticeably faster because heat speeds the reaction.
- Scrub with a soft brush. An old toothbrush or a nylon dish brush lifts the softened scale. For the spray face and individual holes, use a toothpick or a straightened paperclip to poke each hole clear.
- Rinse and reassemble. Run the faucet for 30 seconds to flush loose grit, then screw the aerator back on hand-tight plus a gentle nudge.
If your faucet head is a pull-down or pull-out kitchen sprayer, the same soak works on the spray face — just extend the hose over a cup or bag the spray head. When you’re removing hard water deposits from faucet head sprayers with rubber nozzle tips, you get a bonus: many of those rubber “nibs” let you simply rub the scale off with your thumb once it’s softened.
Which household products actually work — and which ones will ruin your finish?
White vinegar is the safe default, but it’s not your only option, and a few popular “hacks” can permanently damage your faucet. Here’s an honest comparison of what to reach for and what to avoid.
| Product / Method | How well it works | Safe for the finish? | Best for |
|---|---|---|---|
| White vinegar (5% acetic) | Excellent on limescale | Yes — chrome, stainless, most brushed finishes | The everyday go-to; light to heavy scale |
| Lemon juice | Good, milder than vinegar | Yes | Light buildup, better smell |
| Baking soda paste | Mild, mechanical scrub | Yes (soft paste only) | Finishing polish after a vinegar soak |
| Commercial descaler (CLR, Lime-A-Way) | Very strong on stubborn scale | Only per label — limit contact time | Thick, cemented deposits vinegar can’t beat |
| Metal blade / steel wool / scraper | Removes scale fast | No — scratches and dulls the finish | Never use on a visible faucet surface |
| Bleach | Does not dissolve minerals | No — can corrode metal, useless here | Skip it entirely |
A critical warning for anyone with a matte black, oil-rubbed bronze, brushed gold, or brushed nickel faucet: keep acidic soak times short and rinse thoroughly. These specialty finishes are more sensitive than plain chrome, and leaving vinegar or a commercial descaler on for hours can dull or discolor the coating. For those finishes, start with a 15-minute soak, check progress, and repeat rather than doing one long overnight bath. When in doubt, test on the underside of the aerator first.
What if the vinegar soak didn’t fully clear the clog?
If flow is still weak after a soak, the problem is almost always inside the aerator — not on the faucet head surface. The aerator is a stack of tiny screens and a flow restrictor, and hard water grit lodges between those layers where a surface soak can’t reach.
Fully disassemble the aerator: unscrew the housing and gently push out the internal parts, keeping them in order so you can reassemble them correctly. Soak each screen separately in vinegar, then hold the screens up to the light — you should see clean, evenly-lit mesh, not clogged patches. Rinse from the back so debris flushes out the way it came in. Our step-by-step walkthrough on how to unclog a kitchen faucet aerator covers this disassembly in detail with the exact part order.
Still weak after a spotless aerator? Then the mineral buildup may be deeper in the faucet or the issue is genuine low pressure, a failing cartridge, or debris in the supply lines. If your spray modes are the problem — one mode works and another sputters — the diverter or spray face is the culprit, and our guide on how to troubleshoot kitchen faucet spray modes pinpoints it. And if the whole faucet drains or runs slowly regardless of the aerator, read why your faucet drains slowly to trace the real cause upstream.
How do I tackle really thick, cemented deposits that won’t scrub off?
For rock-hard, cemented scale, escalate in three steps: warm vinegar, longer soak, then a commercial descaler as a last resort. Here’s the sequence that avoids damage:
- Warm the vinegar. Heat a cup of white vinegar in the microwave until it’s hot to the touch (not boiling) and soak the removed aerator in it. Heat can roughly double the dissolving speed.
- Do a double soak. Soak an hour, scrub off what’s loosened, then soak again. Removing the top layer lets fresh acid reach the harder core underneath — one long soak often can’t penetrate a thick crust in a single pass.
- Add mechanical help. Between soaks, work the softened scale with a toothbrush and a wooden toothpick. A paste of baking soda gives you a gentle abrasive that won’t scratch.
- Use a commercial descaler carefully. If minerals still won’t budge, a product like CLR will dissolve them fast — but follow the label’s contact-time limit exactly, rinse completely, and never leave it on a specialty finish.
Honestly, if an aerator is so far gone that even this won’t restore it, just replace it. A standard aerator costs a few dollars and screws right in — often cheaper and faster than another hour of soaking. Bring your old one to the store to match the thread size (male vs. female) and diameter.
How do I stop hard water deposits from coming back so fast?
You can’t change your water chemistry with a rag, but you can dramatically slow the buildup. The single most effective habit: wipe the faucet head dry after use. Limescale forms when mineral-rich water evaporates, so removing that water before it dries stops the crust from ever starting.
Beyond the daily wipe, a few things genuinely help:
- Monthly mini-soak. A quick 15-minute vinegar bag once a month keeps scale from ever cementing — far easier than a yearly deep clean.
- Consider a water softener or filter. If your water is above ~10 GPG, a whole-house softener or even a faucet-mounted filter cuts the mineral load at the source and protects every fixture, appliance, and water heater in the home.
- Choose fixtures with rubber-tip nozzles. Many modern pull-down kitchen and shower heads use flexible silicone nozzle tips you can rub clean with a thumb — no soaking required.
- Don’t forget the shower head. The same limescale clogs shower heads and handles; the vinegar-bag trick works there too, and if you’re upgrading hardware, our complete guide to shower faucet knobs covers scale-resistant options.
One hygiene note worth repeating: the same warm, mineral-crusted crevices that trap scale can also harbor biofilm. Keeping the faucet head clean isn’t only about flow and looks — it’s about what’s in the water you drink and cook with. If that’s a concern in your household, see our practical guide on how to prevent bacteria growth in faucets.
Do I ever need to worry about damaging the faucet while cleaning?
Yes — three things damage faucets during descaling, and all three are avoidable. First, abrasive tools: steel wool, metal scrapers, and gritty powders leave micro-scratches that dull chrome permanently and give future scale more surface to grip. Always use nylon brushes, toothpicks, and cloths. Second, over-tightening the aerator on reassembly, which strips the plastic threads or cracks the housing — hand-tight plus a light nudge is enough. Third, leaving acid on sensitive finishes too long, as covered above.
If you regularly deal with heavy scale, it may also be worth thinking about the faucet body material itself, since some hold up to hard water far better than others. Our overview of which faucet materials last the longest is a good next read if a replacement is on the horizon.
FAQ
Can I use vinegar on a matte black or brushed gold faucet head?
Yes, but keep the soak short — start with 15 minutes, check progress, and repeat rather than soaking overnight. Specialty finishes like matte black, oil-rubbed bronze, and brushed gold are more sensitive to prolonged acid contact than plain chrome. Always rinse thoroughly and dry afterward, and test on a hidden spot first.
How long should I soak a faucet head in vinegar?
Thirty minutes clears light buildup; heavy, cemented scale may need a full hour or an overnight soak. Warming the vinegar first roughly doubles the speed. If deposits remain after one soak, scrub off the softened top layer and soak again — a fresh acid pass reaches the harder core underneath.
Will removing hard water deposits from the faucet head fix my low water pressure?
Often, yes — if the weak flow started gradually and is isolated to one faucet, a clogged aerator is the usual cause and a vinegar soak restores it. If flow is still weak after a spotless aerator, the problem is deeper: a failing cartridge, a stuck spray diverter, or genuine low household pressure. Troubleshoot the aerator first because it’s the cheapest, most common fix.
Is it safe to drink water from a faucet that had limescale?
Limescale itself is just dissolved minerals and isn’t harmful to drink. The bigger concern is that mineral crust in a warm, damp faucet tip can trap grime and biofilm over time. Cleaning the faucet head regularly and running the tap briefly before filling a glass keeps your drinking water fresher.
What if the aerator is stuck and won’t unscrew at all?
Don’t force it with bare pliers — wrap the aerator in a cloth or rubber band first for grip and to protect the finish, then turn counterclockwise. If it’s still frozen, soak it in place with a vinegar bag for an hour; dissolving the scale that’s cementing the threads often frees it. As a last resort, a specialized aerator key (a few dollars) matches the notches on recessed aerators.
How often should I clean hard water deposits off my faucet?
A quick 15-minute vinegar mini-soak once a month prevents scale from ever cementing, especially in hard-water areas above 7 GPG. Between soaks, wiping the faucet head dry after each use is the single most effective habit for slowing buildup, since limescale only forms when mineral water evaporates on the surface.
A note on expertise and standards
Author: This guide was written by the WOWOW Faucet product and support team, who field real customer questions about limescale, flow, and finish care every week and test descaling methods across chrome, stainless, brushed nickel, and matte black fixtures. About WOWOW: WOWOW designs and manufactures kitchen and bathroom faucets, shower systems, and fixtures engineered for durability in real households, including hard-water regions. Our faucets are built with lead-free, corrosion-resistant materials and are tested to meet cUPC and NSF/ANSI standards for drinking-water safety, and most are backed by a limited lifetime warranty on finish and function — so a lifetime of routine descaling won’t void your coverage when you use the gentle, non-abrasive methods described above. For personalized help with a specific WOWOW model, our support team can recommend the exact aerator or spray-face replacement part.